
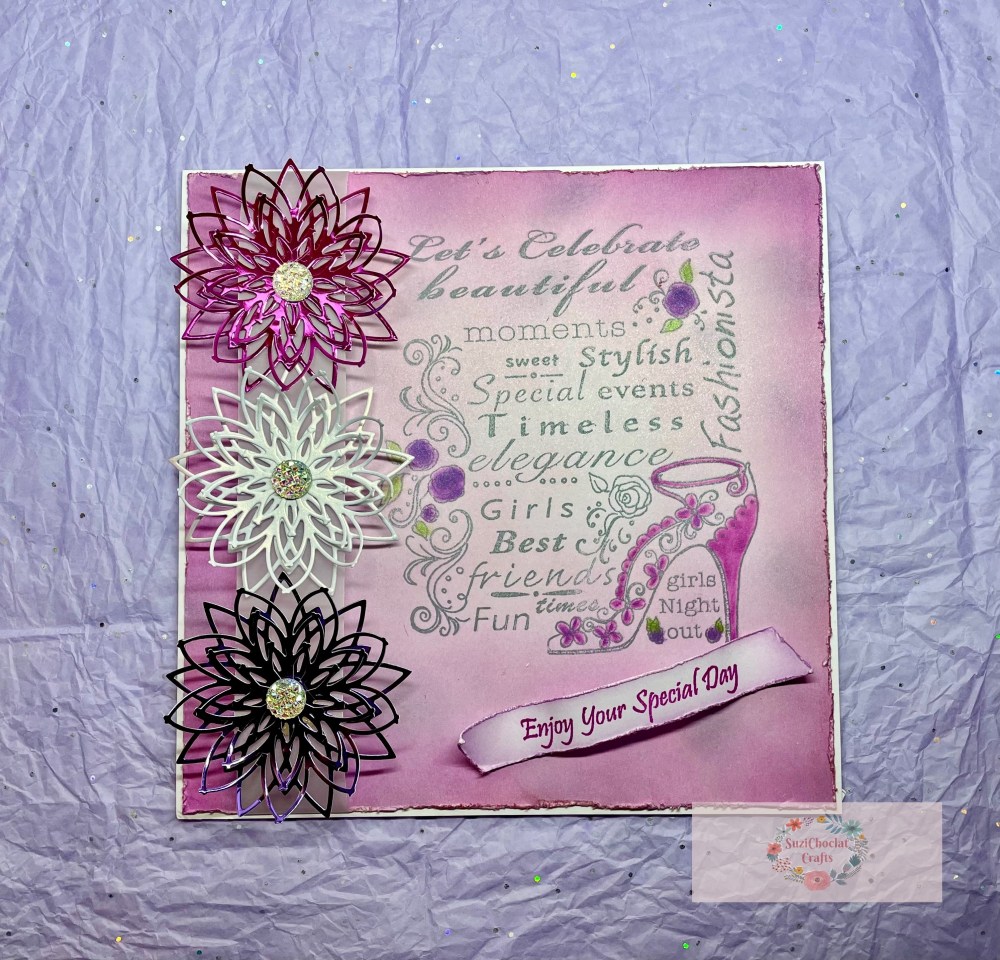
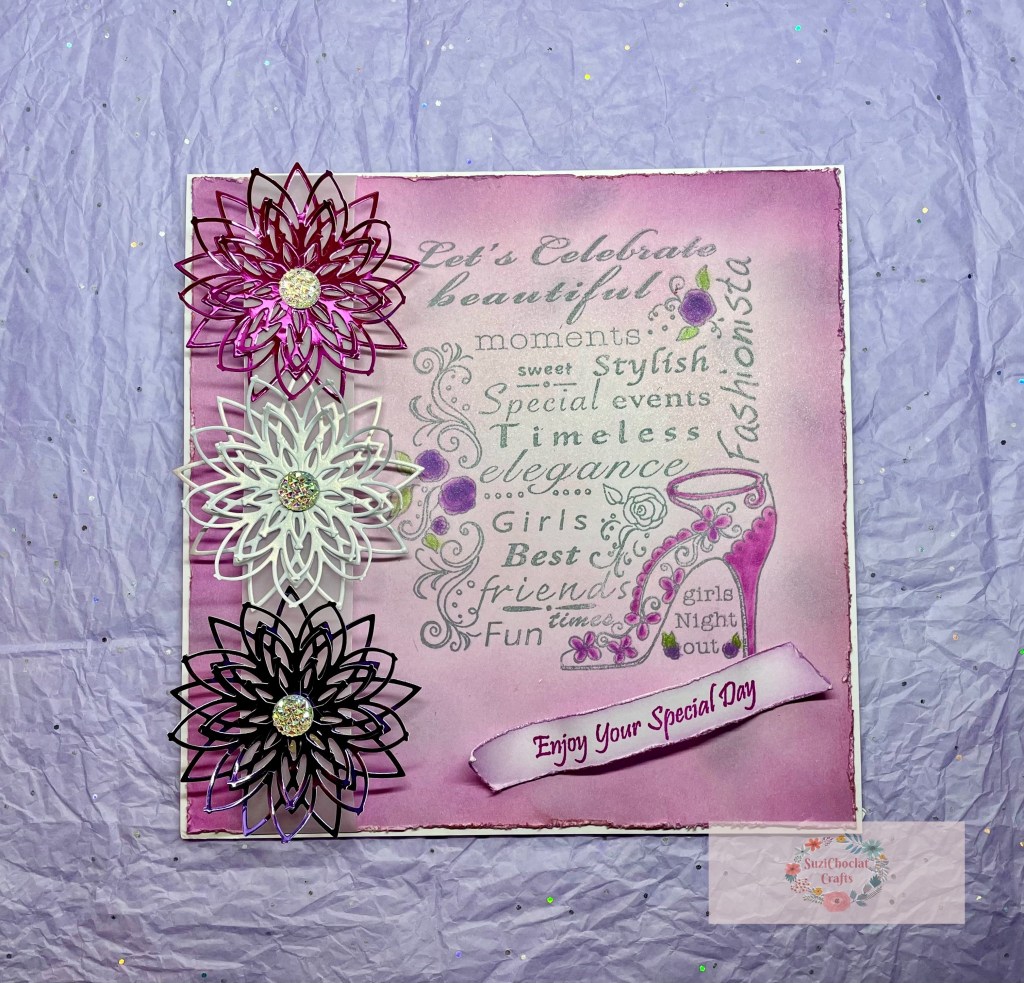
I wanted to make a special card for my crafty friend Elizabeth who loves Heartfelt Creations, so I used one of their stamps called Fashionista.
STEP BY STEP INSTRUCTIONS ~ HOW TO MAKE
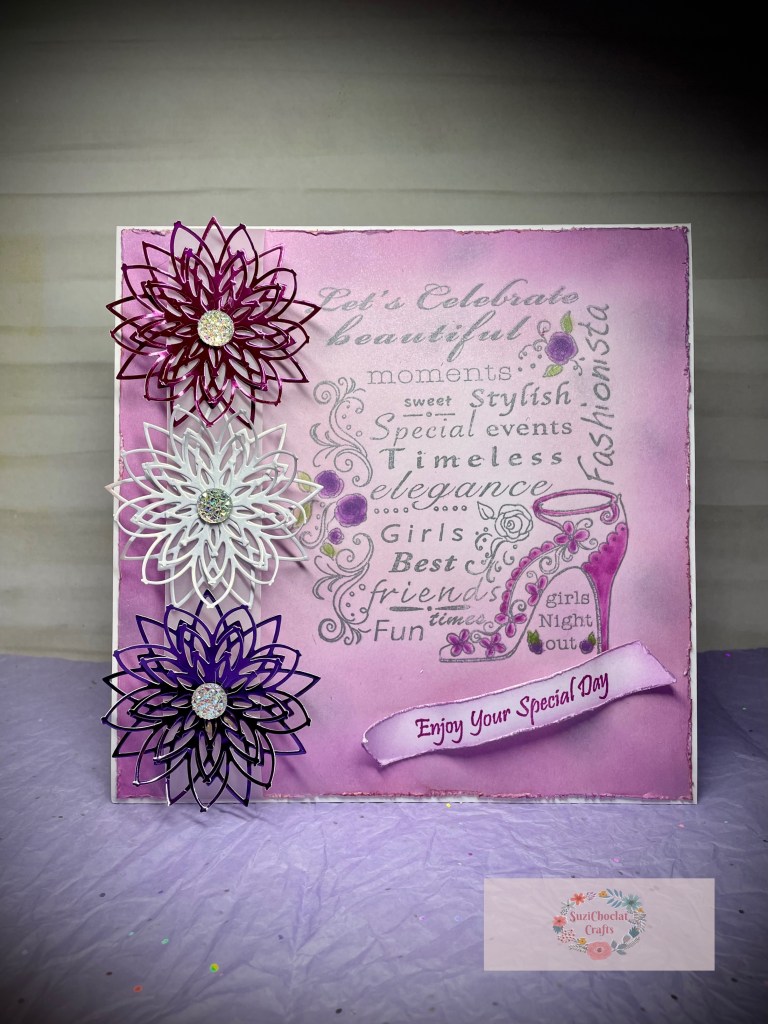
I started with a piece of plain white card, stamping the large stamp with some grey shimmer ink set over to one side and towards the top, leaving room for some flowers down the left and a sentiment at the bottom right.
I wanted the card to be in Elizabeths favourite colours so chose to pick out parts of the shoe with a bright pink ink and colour with a tiny blending brush.
I then used the same brush to colour the roses and leaves. Wasn’t particularly impressed with the way the brush coloured the roses but once done there wasn’t anything I could do to change. Lesson learnt for next time!
To get some colour for the card background I used all shimmer inks. Starting with a pale dusky rose coloured ink going all around the card edges and carrying on inking almost to the middle of the stamp reducing the depth of colour as I went, leaving a small white area highlighting the centre of the wording.
Then I blended a darker pink shimmer ink over top, making the edges a little darker than the rest of the card, again reducing the depth of colour as I went towards the centre of the stamp. To bring in a different colour to match the darkness of the roses, I blended some of the grey ink I had stamped the wording with randomly to give a little dimension to the background area.
The next step was to rough up the edges of the 7 3/4” square topper with a distress tool I have from Sizzix. When I had gone all the way around with the tool, I used the residual pink ink in my blending brush to slightly colour the white edges that had been revealed.
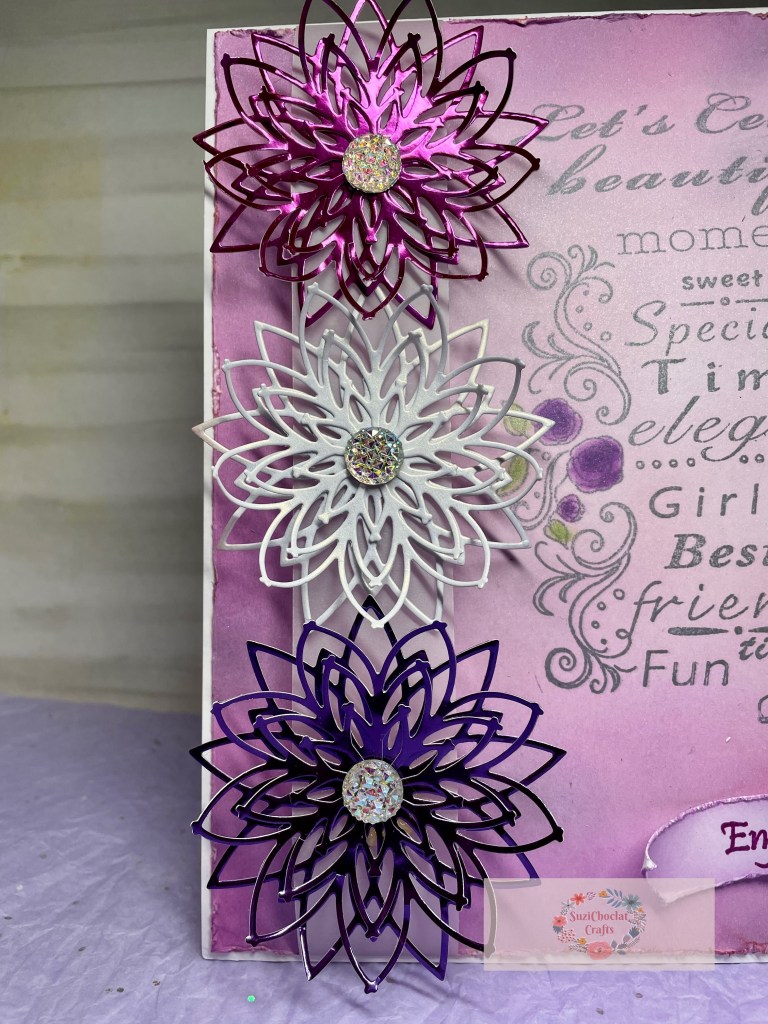
i wanted some big flowers down the left hand side so chose to die cut some spiky layered flowers in 3 different colours. I used a dark pink and purple Mirri card and an ivory pearl card. To add to the texture and dimension of the card, I chose to attach a strip of white vellum down the left side of the card. I wrapped it over the top and bottom, sticking with double sided tape on the back.
Leaving the vellum quite loose so that it was raised up, under the half way mark I added 3 pieces of thick foam tape in a little stack. I did this so that when I added the flowers the weight of them didn’t flatten the vellum. I then used hot glue to adhere the spiky flowers to the vellum which worked very well as it dries quickly and held the flowers exactly where I wanted them, slightly touching each other.
The only thing left to do was to find a centre for the flowers and make the sentiment strip. I chose a large sparkly flat gem for the flowers, hot glueing them into place. The sentiment was stamped on to a strip of white card using the same dark pink ink. I cut to size with a guillotine, diagonally chopped the ends, inked the edges, distressed the edges and inked again. Using my bone folder I curled and twisted the ends of the sentiment strip so I could get some dimension on the right side of the card too. I used a blob of hot glue at one end to adhere the strip, waited for it to dry before adding hot glue to the other end pushing the strip to raise the middle before adhering to the card.
I stuck the topper to the 8” square card base with Collall general purpose clear glue, leaving an equal border showing all around. I love this glue as it gives great strength to any project you use it on.
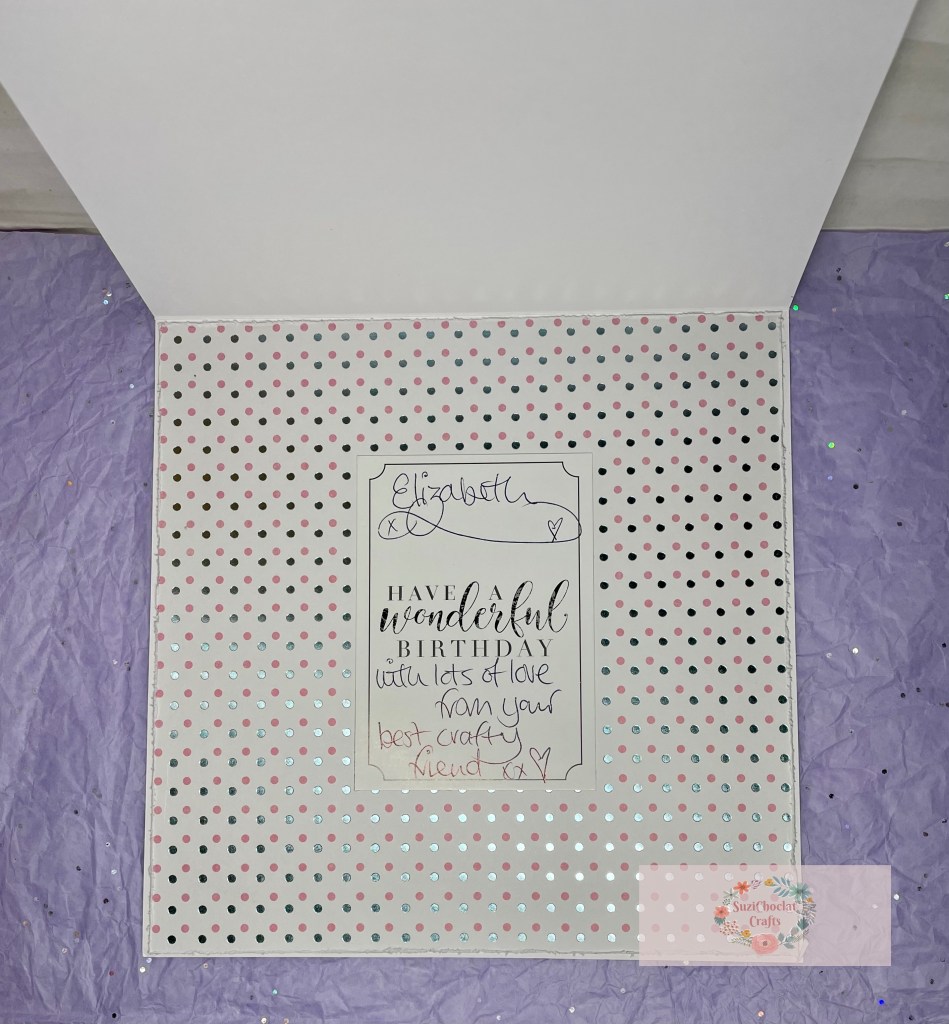
I decided to make the card a little more special by decorating the inside of the card to match the box I wanted to make.
The end result turned out like this, let me know if you like this card in the comments below. Any questions please just ask. Thank you so much for spending a little of your time with me today 💖
Until next time
Take care
Suzi xx

I absolutely loved it, thank you Suzanne, and it is to be framed for my dressing table!!
LikeLiked by 1 person
Oh wow, that is special 🥰 so, so pleased you loved it and the added bonus that it matched your bedroom 💖💜 thank you so very much for leaving such a super comment xxx
LikeLike